
Uploading a site with a ZIP
The ZIP uploader lets you create and update many pages and assets at once. You upload a ZIP of your site, the portal validates every file and shows you exactly what it will do, you pick what to process, and it deploys. Find it in the portal under Agentic Toolkit → Upload Brand Assets. The process runs as a four-step wizard: Upload → Validate → Confirm → Deploy.
Before you start: prepare your ZIP
The folder structure inside your ZIP becomes your page structure. A file at zip-demo/about-us.html is created at the path /zip-demo/about-us, so use folders to lay out your URLs.
- Pages: each
.htmlfile becomes a page. - Assets: images (
.webp .png .svg .jpeg .jpg .ico .gif),.css,.js,.json, and fonts (.woff2 .ttf) are uploaded as brand assets. - Anything else (for example
.txt,.docx,.exe) is unsupported and will be skipped, not deployed. - Size: up to 400MB per file.
If a page already exists at a path, the uploader updates it in place rather than creating a duplicate.
Step 1
Upload
Open Agentic Toolkit → Upload Brand Assets. Drag your ZIP onto the drop zone, or click Browse files to choose it. The supported file types and the size limit are listed in the drop zone.
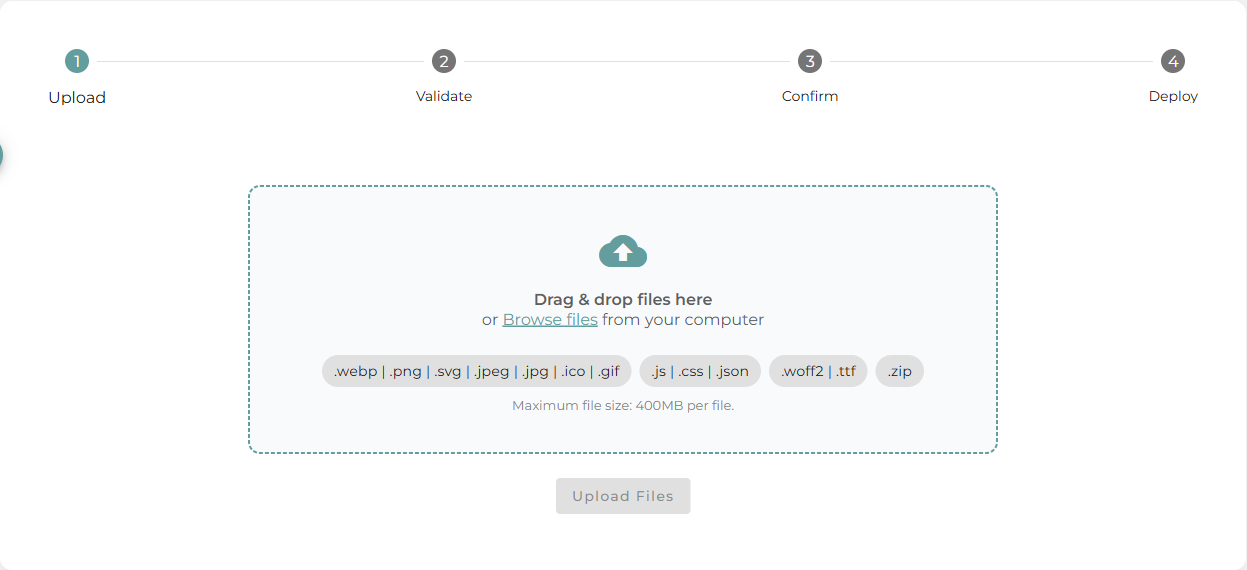
Your file appears below the drop zone. Click Upload Files to send it for validation.
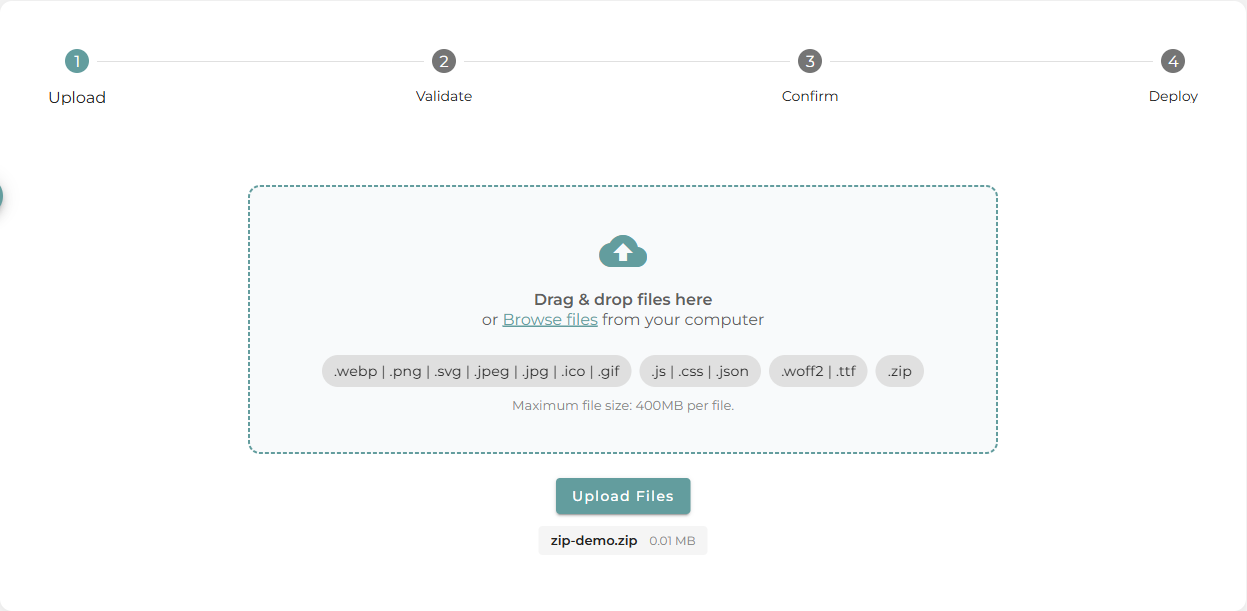
zip-demo.zip 0.01 MB). You still need to click Upload Files to send it for validation. If nothing seems to happen after picking your file, check it is listed there and click the button. Step 2
Validate and review
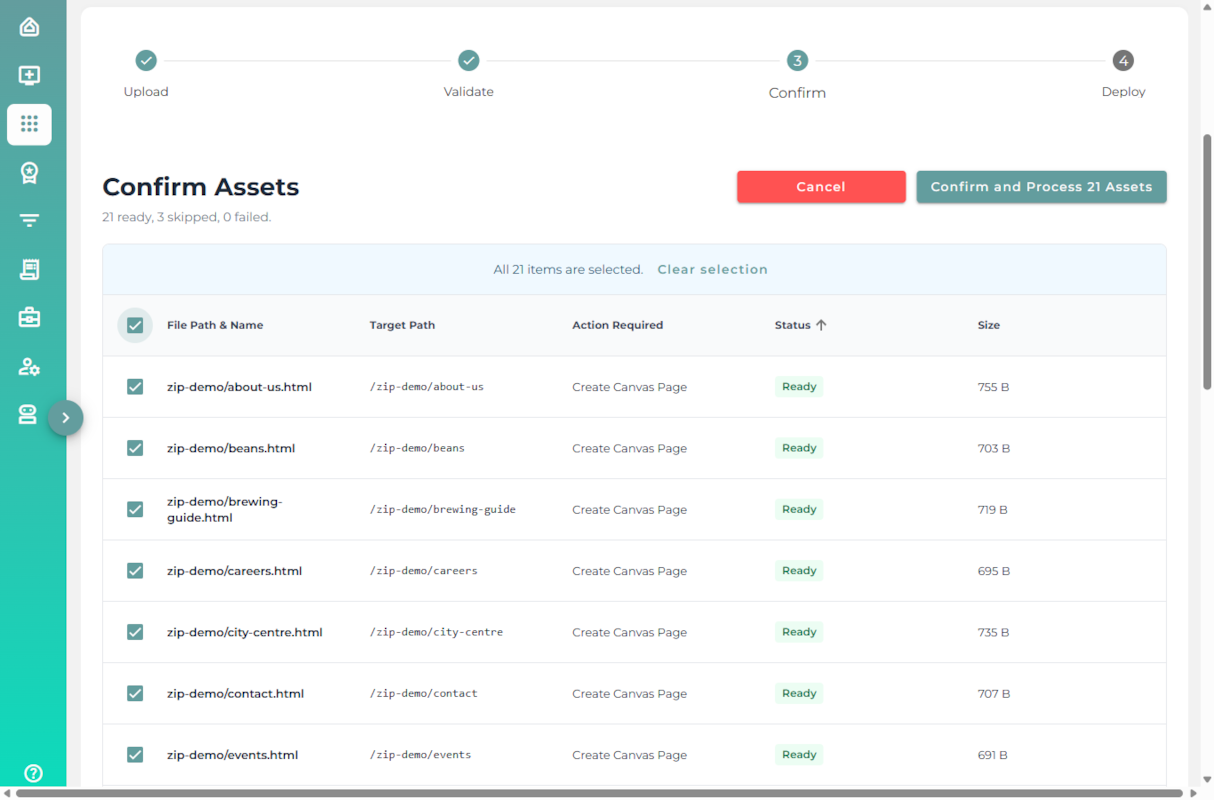
The uploader reads every file in the ZIP and shows a summary, for example "21 ready, 3 skipped, 0 failed", followed by a table with one row per file:
- File Path & Name: the file as it sits in your ZIP.
- Target Path: where it will land on your site.
- Action Required: what will happen, such as Create Canvas Page for a new page or Save Asset for an image or stylesheet.
- Status: Ready to process, or Skipped (with the reason).
- Size: the file size.
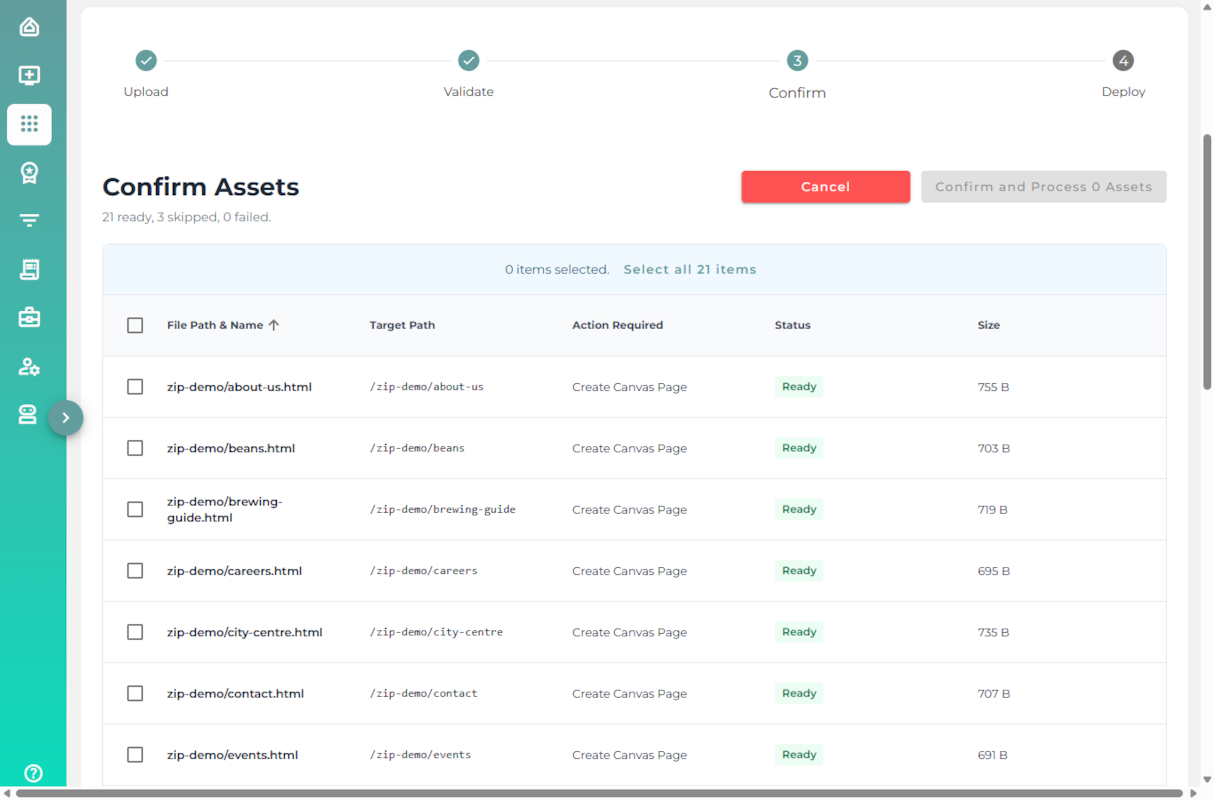
Sort the columns to check your upload
Click any column header to sort by it. Sorting by Status is the quickest way to pull all the skipped files together so you can see, at a glance, what will not be deployed and why. In the example below the three unsupported files (.exe, .docx, .txt) are grouped at the end, each marked Skipped with the reason "Unsupported file type".
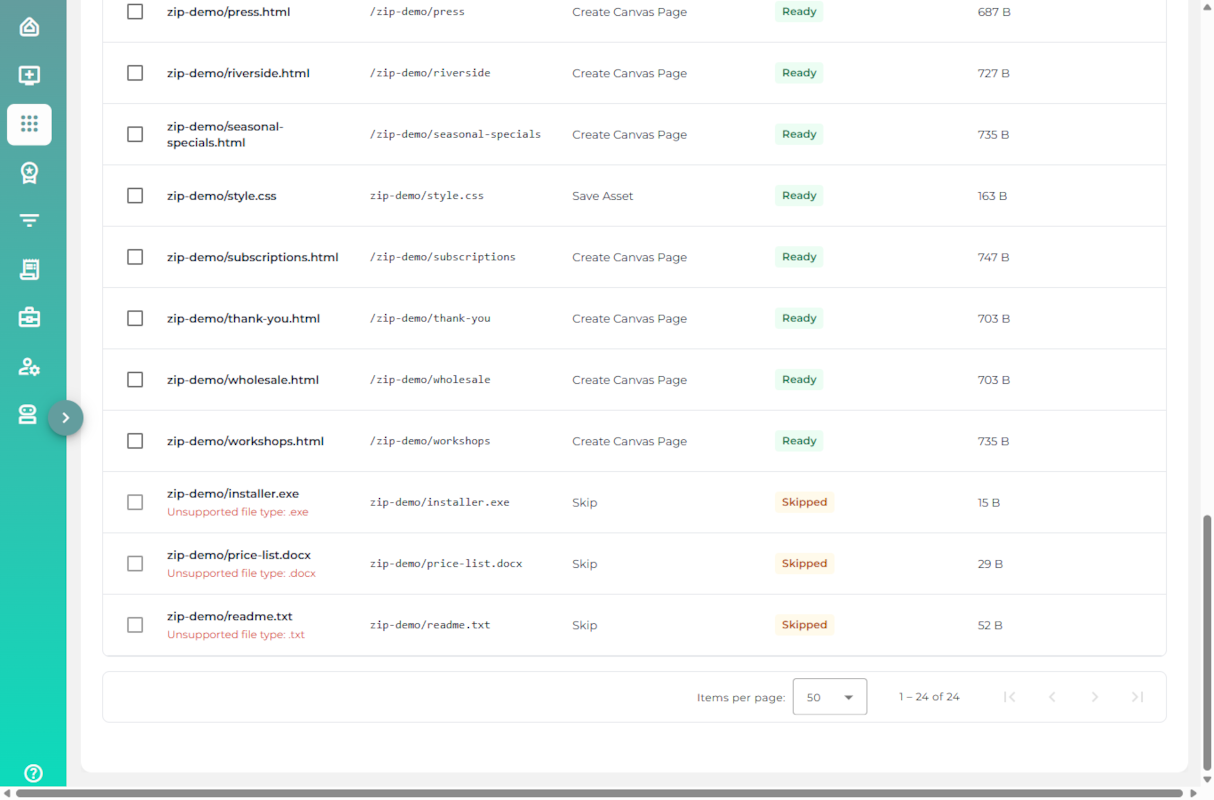
Choose what to process
Use the checkboxes to choose which files to deploy. Tick the box in the header row to select everything on the page, or use the Select all X items link in the blue bar to select every ready file at once. Clear selection resets it. Skipped files cannot be selected, so the count only ever covers the files that can actually be processed.
Steps 3 & 4
Confirm and deploy
When you are happy with the selection, click Confirm and Process [N] Assets. The uploader creates the pages, uploads the assets, and links everything up. Larger uploads show live progress; smaller ones finish in moments.
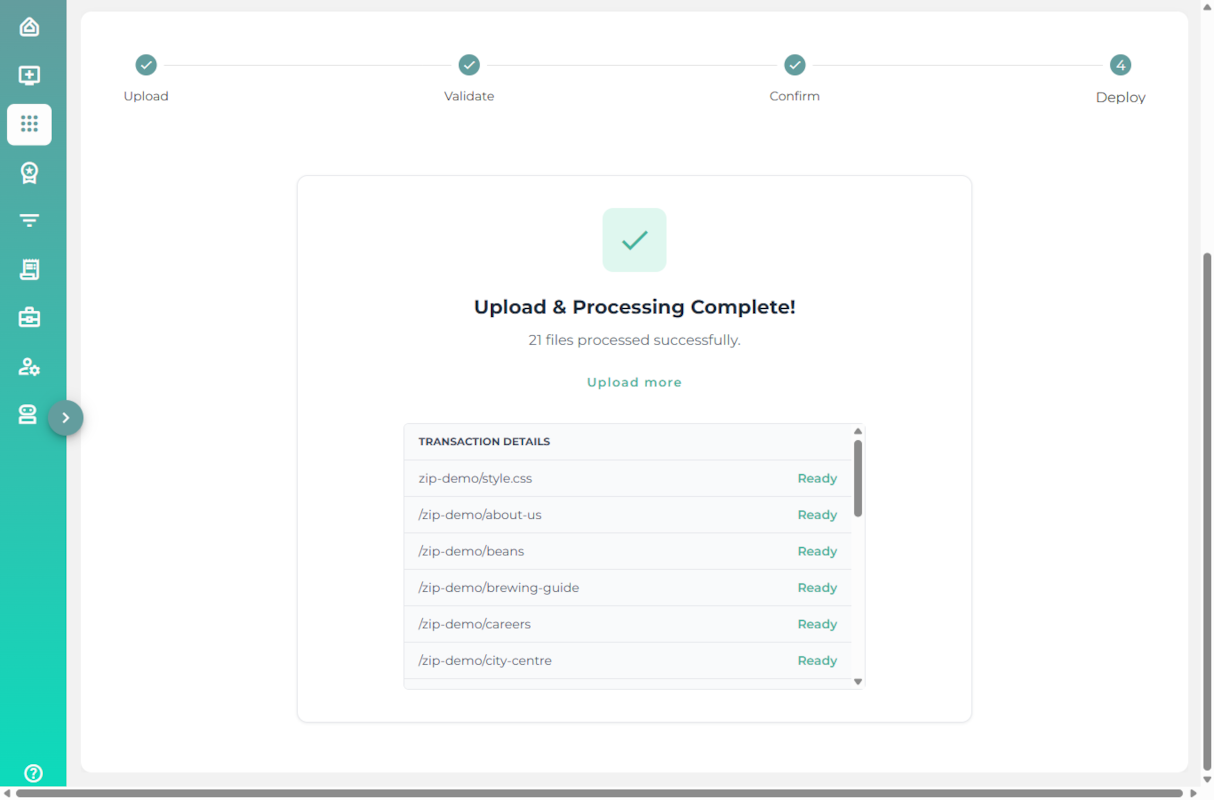
When it is done you see a confirmation, for example "Upload & Processing Complete! 21 files processed successfully", with a transaction list of everything that was deployed. Use Upload more to run another ZIP.
Common issues to avoid
Two things catch people out. Both take seconds to check at the Validate step and save a round of back-and-forth later.