
Linking your domain in the portal
Published Updated
Pointing your DNS at the platform is only half of linking a domain: the domain also needs adding to your brand in the portal, so the platform knows to serve your site on it. This guide covers the Domain Linking tab, the Add Domain steps, and the choice you make along the way: whether we handle your SSL certificate, or your Cloudflare account does.
First, choose who handles SSL
Every linked domain needs an SSL certificate so it serves securely over https. There are two ways to get one, and the choice changes which DNS record you create:
| We handle SSL (the default) | Cloudflare Proxy | |
|---|---|---|
| Who issues the certificate | The platform creates and renews it for you | Your own Cloudflare account |
| Your CNAME target | app.hubpeople.ai | dns-proxy.hubpeople.ai |
| Proxy setting at your DNS provider | Must be disabled (a proxy blocks certificate generation) | Must be enabled (the orange cloud) |
| Good fit when | You want the simplest setup, with any DNS provider | Your domain already runs through Cloudflare and you want its edge features |
If you are going the Cloudflare route, the Cloudflare DNS and SSL guide covers the settings on the Cloudflare side in full. Either way, the portal steps below are the same, with one checkbox deciding which instructions you see.
The Domain Linking tab
Open your brand and pick the Domain Linking tab. Before you link anything, your brand serves on a temporary address; once domains are added, they are listed here with their statuses, refreshed automatically:
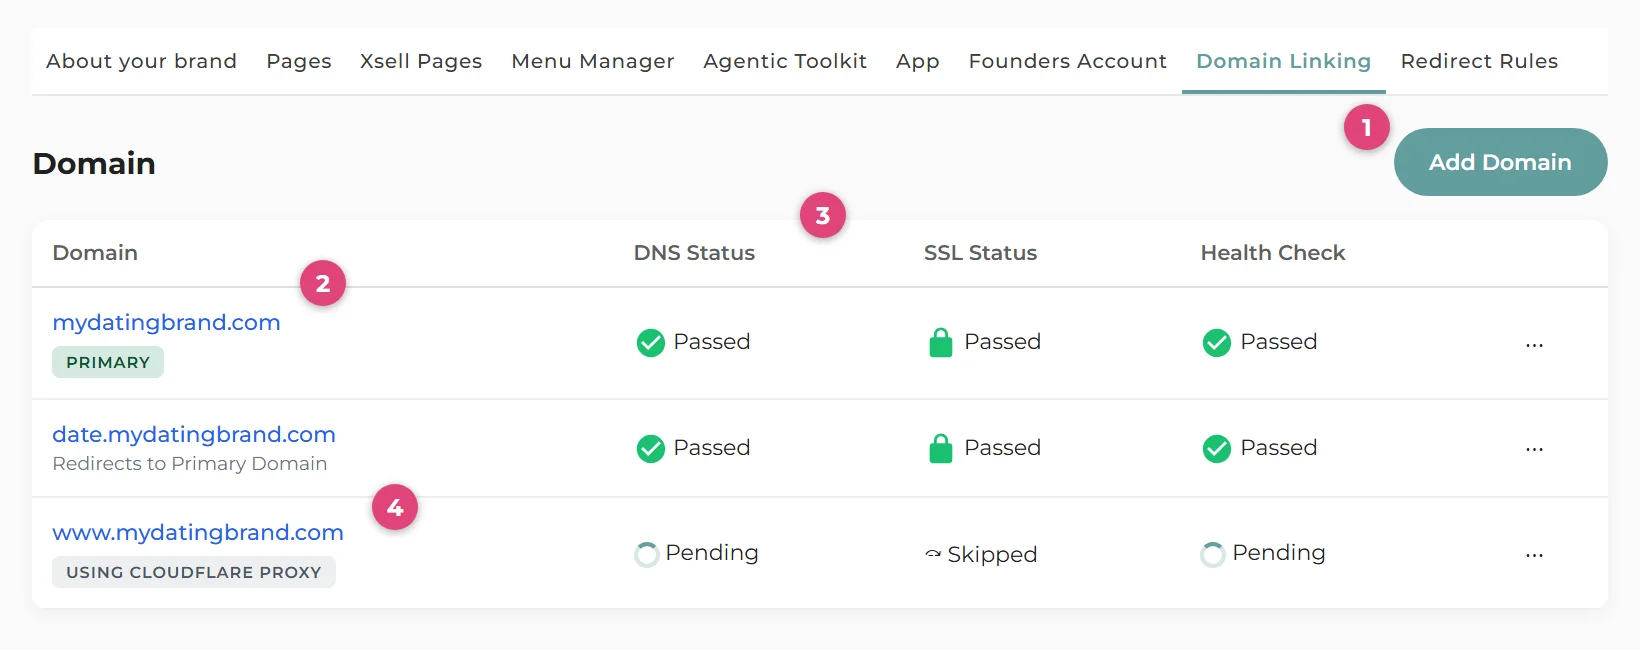
Each domain shows three checks, each with an info icon explaining it in the portal:
- DNS Status: is your DNS record pointing at our servers? This can take up to 24 hours to pass, because DNS changes take time to propagate. If it still has not passed after that, re-check the record; you can delete and re-add it if needed.
- SSL Status: has the certificate been created? On a Cloudflare Proxy domain this shows as skipped, because Cloudflare holds the certificate instead.
- Health Check: is the domain resolving properly and ready to drive traffic to?
Adding a domain: the three steps
Press Add Domain and a three-step walkthrough opens. Step 1 covers buying a domain if you do not have one yet. Step 2 is where the SSL choice happens:
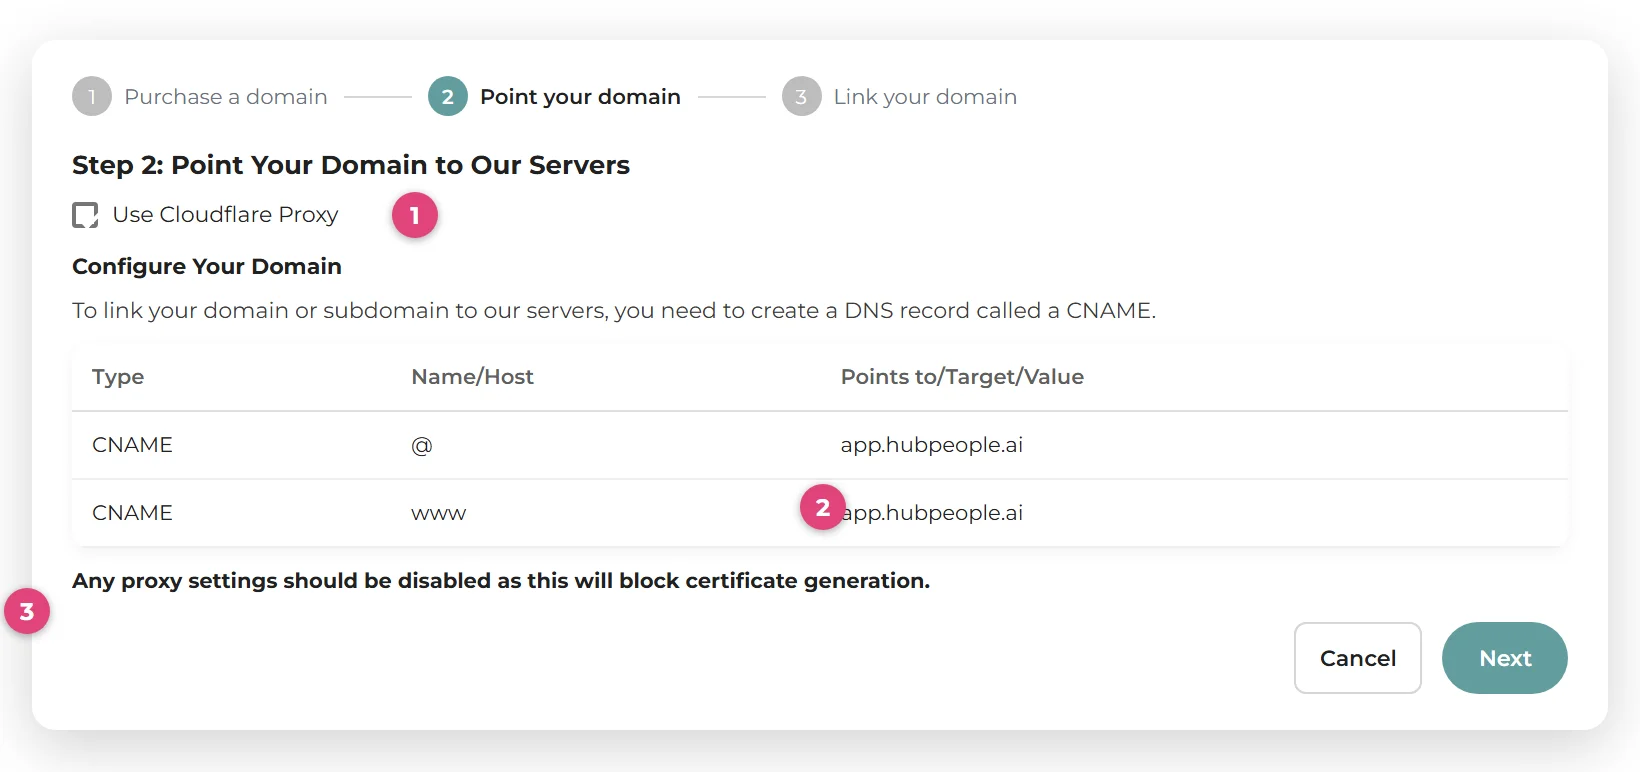
- Decide on the checkbox. Leave Use Cloudflare Proxy unticked for the default, platform-managed SSL; tick it if your domain runs through Cloudflare with the proxy on.
- Create the CNAME it shows you. With the box unticked, point your domain at
app.hubpeople.aiand make sure any proxying is off. With it ticked, point atdns-proxy.hubpeople.aiwith the Cloudflare proxy on. You can add records for the root (@), www, or any subdomain. - Tell the portal about the domain in step 3: type the exact domain into Your app domain and press Submit. Add each domain separately; a brand can have up to three.
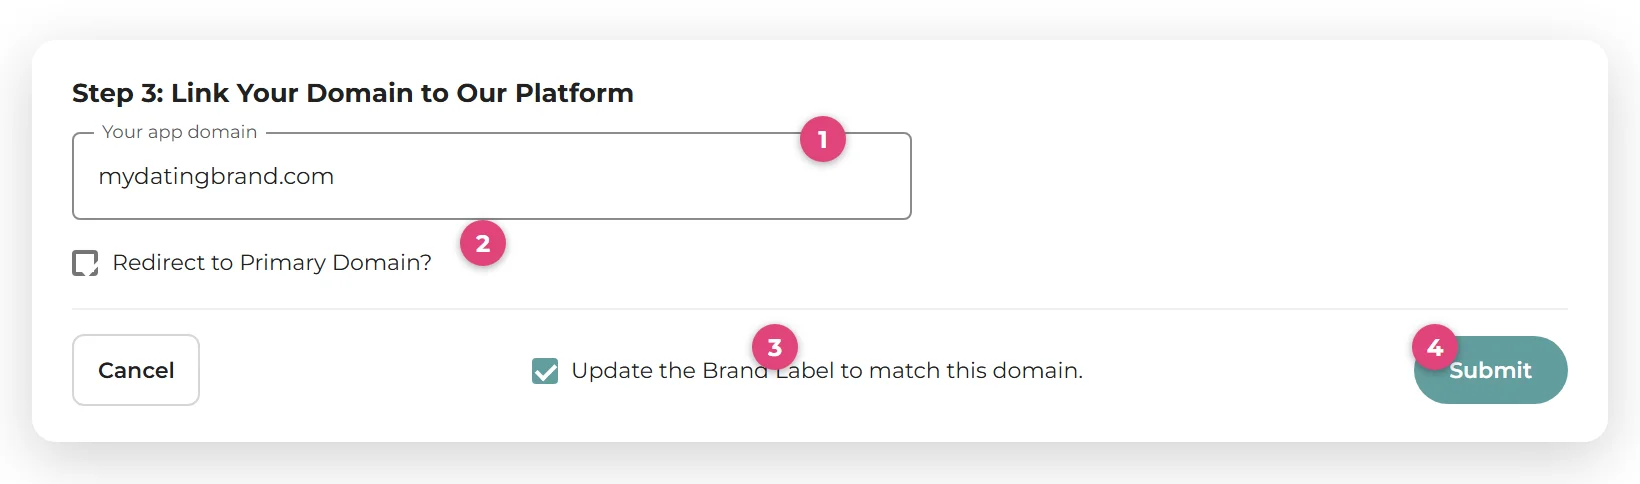
After you submit, the system links the domain, creates the SSL certificate (unless Cloudflare is handling it), and runs the health checks. Watch the three status columns come good; DNS can be the slow one.
Extra domains: redirect to your primary
When you add a second or third domain, the Redirect to Primary Domain? box sends its visitors straight to your main domain. That keeps all your traffic on one address, which is better for search engines and avoids duplicate copies of your site. You can switch this on or off later from the row's menu on the Domain Linking tab.
Good to know
- Your temporary address keeps working while you set the domain up, so nothing goes dark during linking.
- Brand label: the step 3 checkbox updates your brand's label to match the domain, which is how your brand is identified in reports and analytics. Using your primary domain as the label is recommended.
- Deleting a domain is in the row's menu. If the domain was redirecting to your primary, stop the redirect first.
- Members area on your own domain is set up separately, under Advanced Settings on the same tab; the Cloudflare guide lists the records.