
Redirect Rules: sending old addresses to new pages
Published Updated
A redirect rule sends anyone who visits an old address straight to the right page instead. It is what keeps links working after you rename, move, or retire a page, and it tells search engines where the page has gone. This guide shows you where Redirect Rules live in the portal, how to create your first rule, and how to read the warnings the platform gives you.
Where to find Redirect Rules
Open your brand in the portal and pick the Redirect Rules tab in the row of tabs across the top of the brand page. The screen has three parts: the rule type chooser, the form for the rule you are creating or editing, and the list of rules you already have.
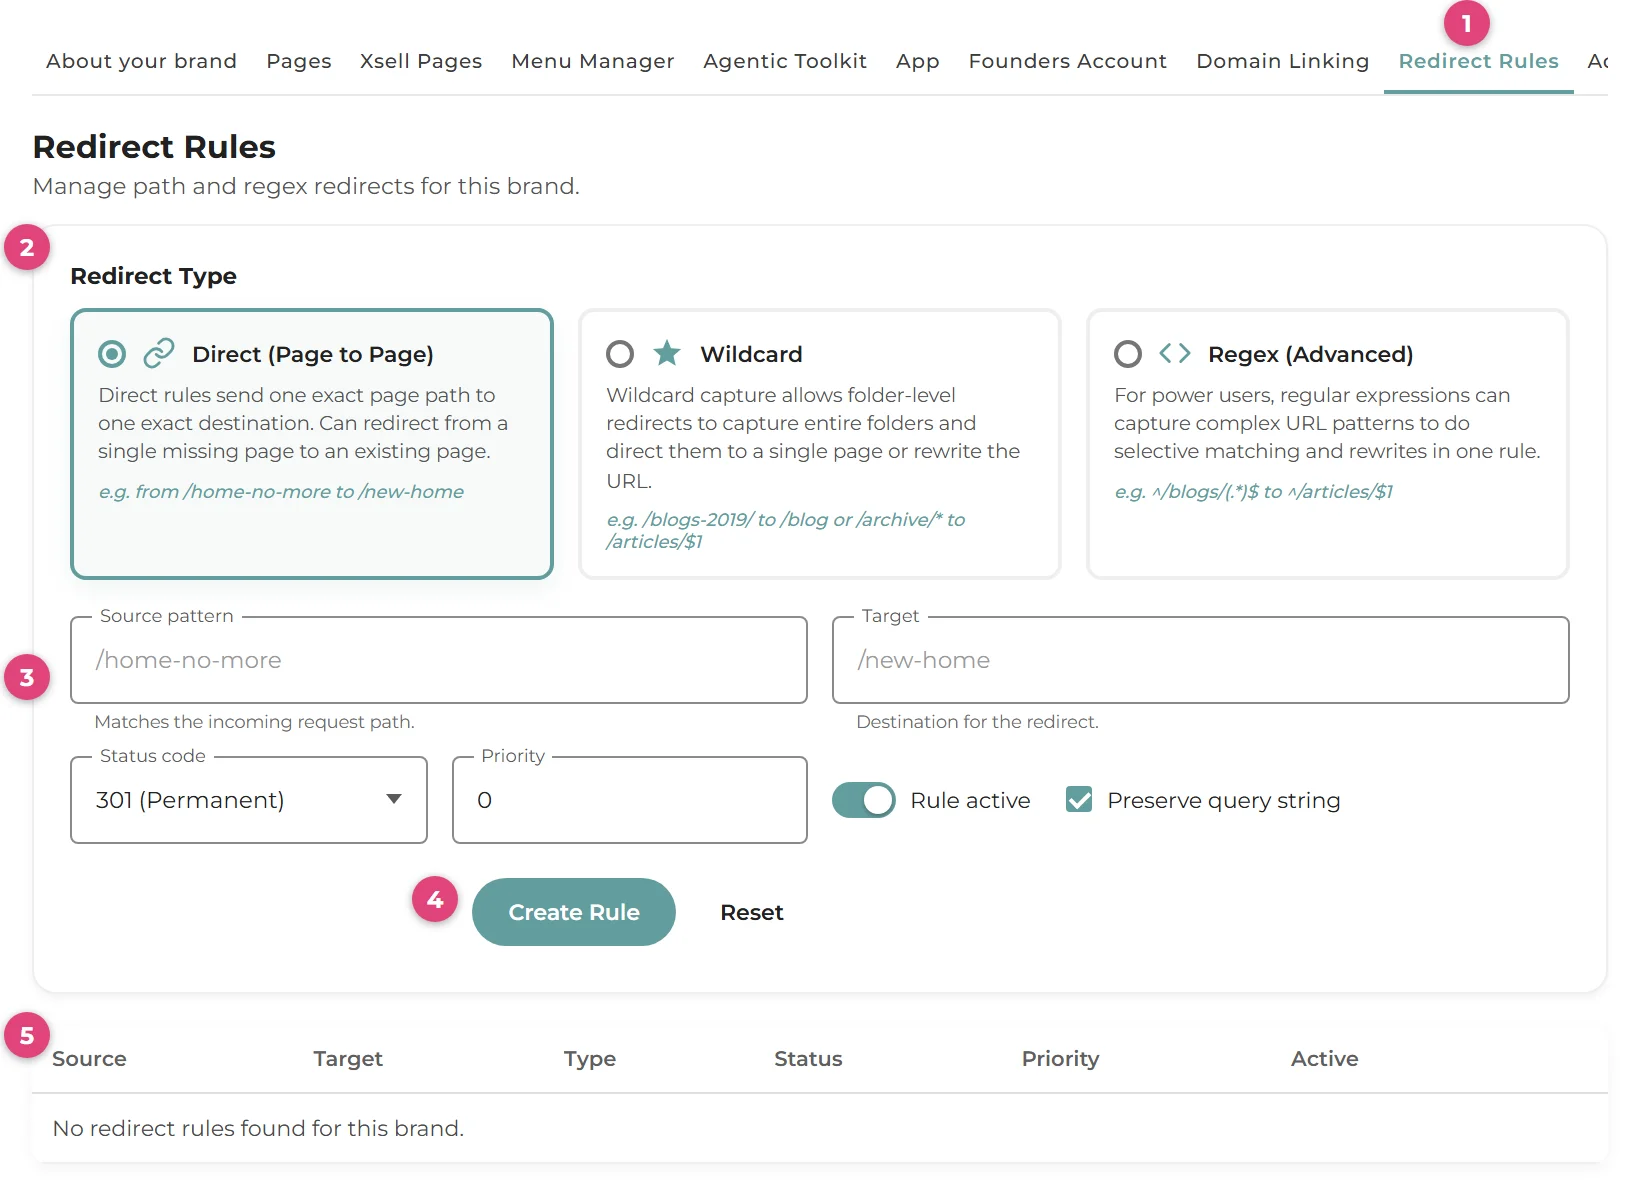
One rule to remember: live pages come first
Before creating anything, know this: a redirect only runs where there is no live page. When a visitor asks for an address, the platform serves the published page at that address if one exists. Only when there is no page does it check your redirect rules. This is a safety feature: a redirect can never knock out a page that is still live.
The three rule types
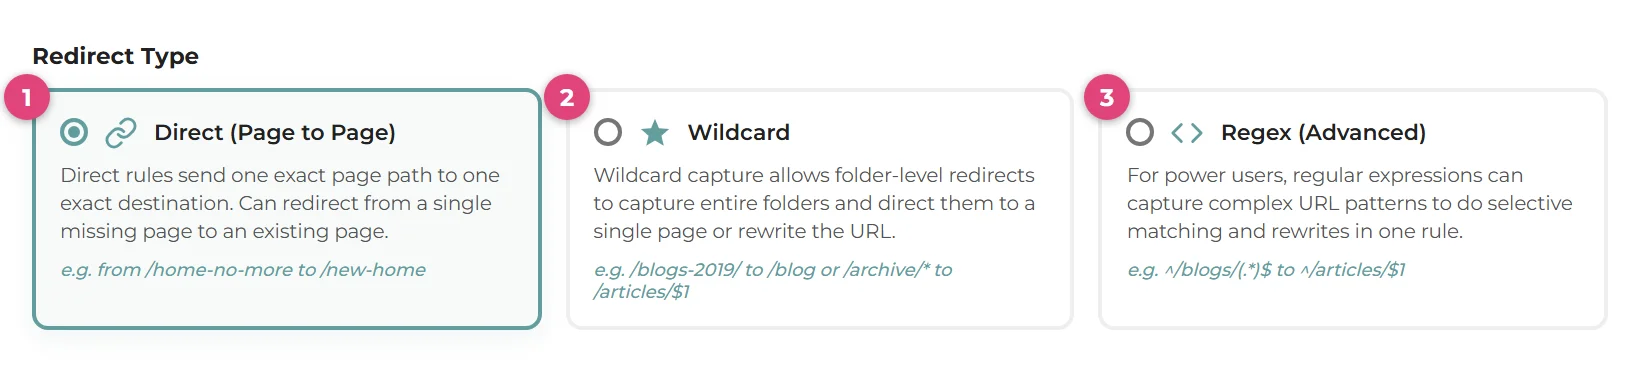
| Type | What it does | Example |
|---|---|---|
| Direct (Page to Page) (1) | Sends one exact address to one destination. The right choice for most jobs. | /old-offers to /pricing |
| Wildcard (2) | Covers a whole folder of addresses in one rule. The * matches anything, and $1 in the target re-uses what it matched. | /blog-2019/* to /blog/$1 |
| Regex (Advanced) (3) | Full regular expressions for selective matching and rewrites. For power users. | ^/products/(\d+)$ to /shop/$1 |
Creating your first rule
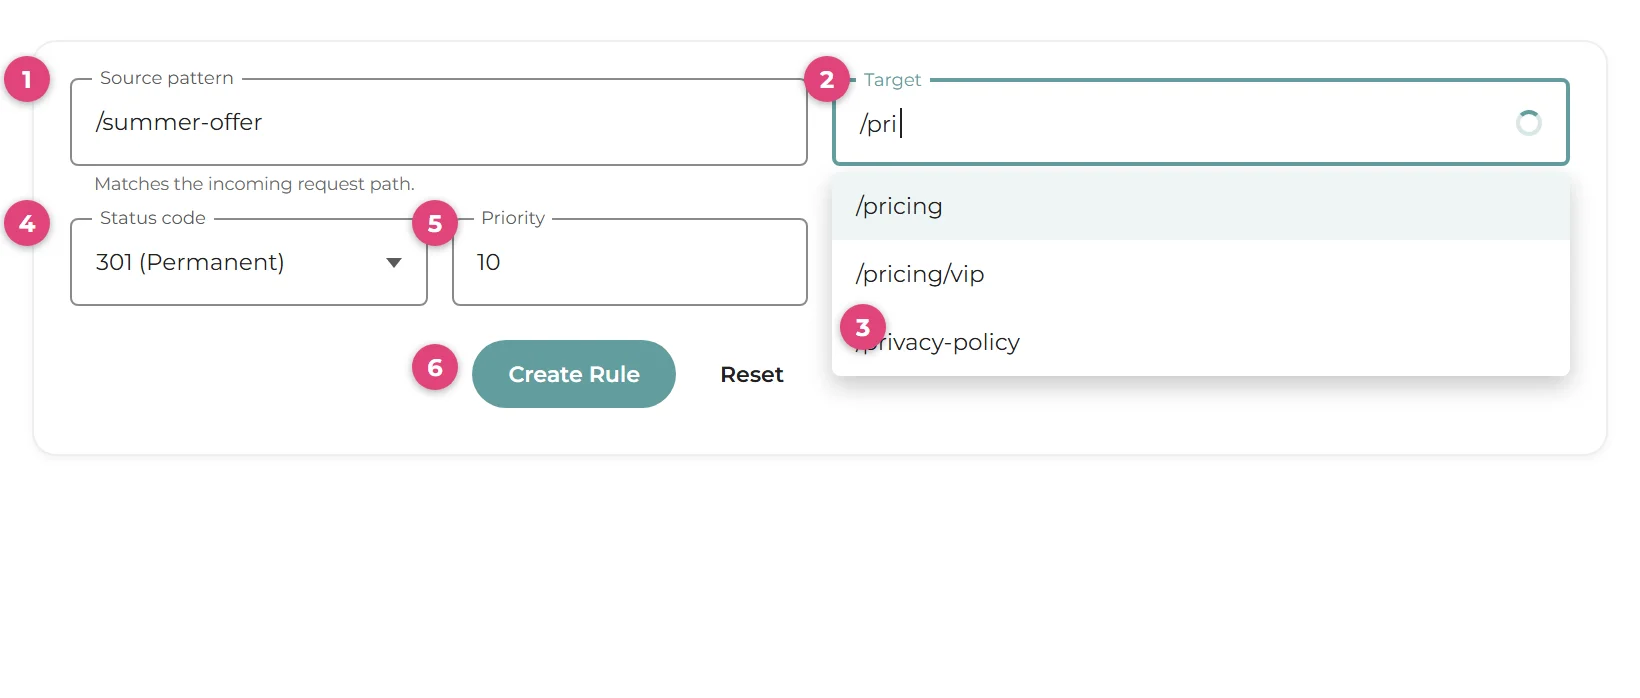
- Source pattern (1): the old address, starting with a slash, for example
/summer-offer. This is what the visitor typed or clicked. - Target (2): where to send them. Start typing and the portal suggests your existing pages (3), so you can pick a real destination rather than guess. You can also paste a full web address (starting
https://) to send visitors to another site. - Status code (4): 301 (Permanent) or 302 (Temporary). See below; 301 is the default and usually right.
- Priority (5): only matters when rules overlap. Higher numbers are checked first. Leave it at 0 unless you need it.
- Rule active and Preserve query string: active is on by default; switch it off to park a rule without deleting it. Preserve query string carries anything after a
?through to the target (useful for tracking links), and is on by default. - Press Create Rule (6). The rule appears in the list below and starts working on your live site within about a minute.
Reading your rules list
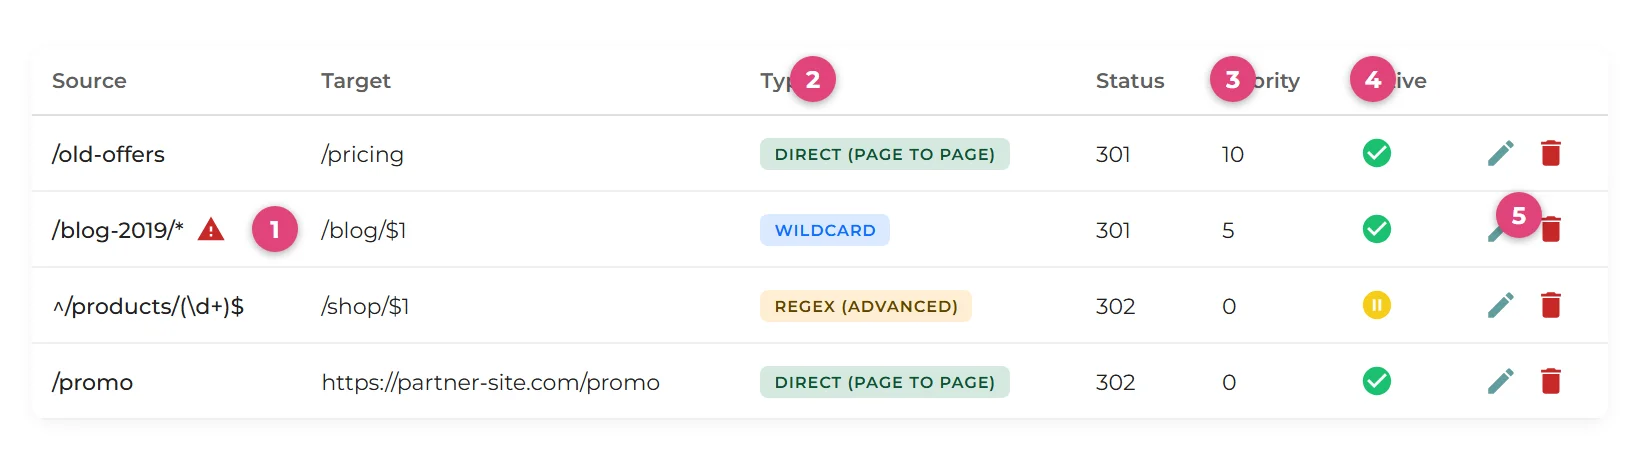
Rules are listed highest priority first. The green tick means the rule is active; the amber pause icon means it is switched off. Use the pencil to load a rule back into the form for editing, and the bin to delete it. Deleting asks you to confirm first, because a deleted rule cannot be undone:

Warnings on a rule
The platform checks every rule against your real pages and your other rules, and shows a warning triangle next to any rule with a potential issue (1 in the screenshot above). Click the triangle to read the details:
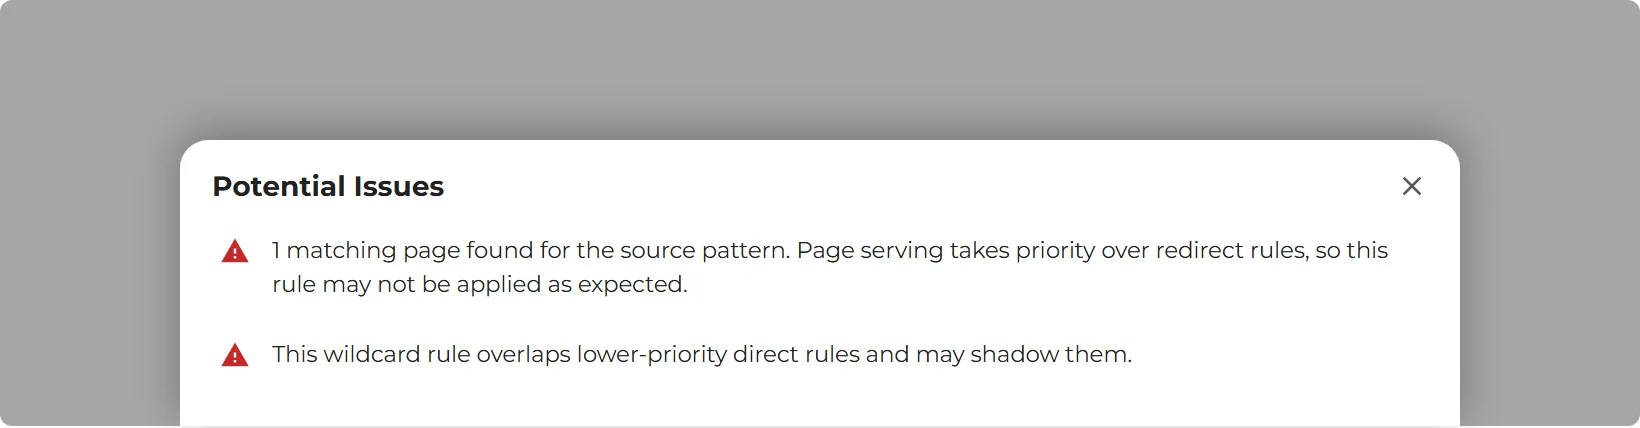
The warnings you are most likely to see:
- "Matching page found... page serving takes priority." The source address is still a live page, so the page wins and the rule waits (see above). Retire the page if you really want the redirect.
- Rules sharing the same source. Two active rules match the same address; priority decides which one runs.
- A broad rule shadowing a specific one. A high-priority wildcard can swallow addresses your more specific rules were meant to handle. Give the specific rule the higher priority.
- Target points at a page that does not exist. The redirect will still send visitors there, but they will land on your 404 page, so fix the target.
A warning never blocks you from saving: it is advice, not a lock. But it is worth resolving every warning before you move on.
Permanent (301) or temporary (302)
- 301 (Permanent): the page has moved for good. Search engines transfer the old address's standing to the new one. Right for renames, retirements and migrations. This is the default.
- 302 (Temporary): the move is short-lived, for example a seasonal page pointing at this month's campaign. Search engines keep the old address on file.
Good to know
- Changes take up to a minute. Your live site refreshes its copy of the rules roughly every 60 seconds, so give a new or edited rule a moment before testing it.
- Redirects apply to page addresses only. Addresses that end in a file extension (for example
.html,.jpg,.pdf) are treated as files and are not matched by redirect rules. - Query strings: with Preserve query string on,
/summer-offer?src=emailredirects to/pricing?src=email. If your target already has its own?part, the visitor's is not added on top. - Sending visitors to another website (a full
https://target) is allowed only for destinations your account has permission to link to. If a save is rejected with a link-permission message, talk to support. - Test the real address. After the minute is up, open the old address in a private browser window and check you land where you expect.
- Domain set up through Cloudflare? If you linked your domain the advised way, through your own Cloudflare account with the proxy enabled, Cloudflare's redirect rules are an option too. The deep dive compares the two approaches and when each makes sense.