
Editing page settings in bulk
The Bulk Page Editor changes settings across many pages at once instead of opening each page one by one. You pick a set of settings, filter to the pages you want, and then either edit them in a grid or export them to a spreadsheet, change them there, and import them back. It is ideal for jobs like giving every article a fresh meta description, pointing a batch of pages at the right menu, or tidying share-card titles before a launch.
Where to find it
Open your brand and go to the page browser. You can start the Bulk Page Editor two ways:
- The Bulk Edit button on the brand's landing view, which opens the editor for the whole brand.
- The Bulk Edit item in a page's three-dots menu, which opens the editor starting from that page.
The editor opens as a panel over the page browser, so you keep your place in the site while you work.
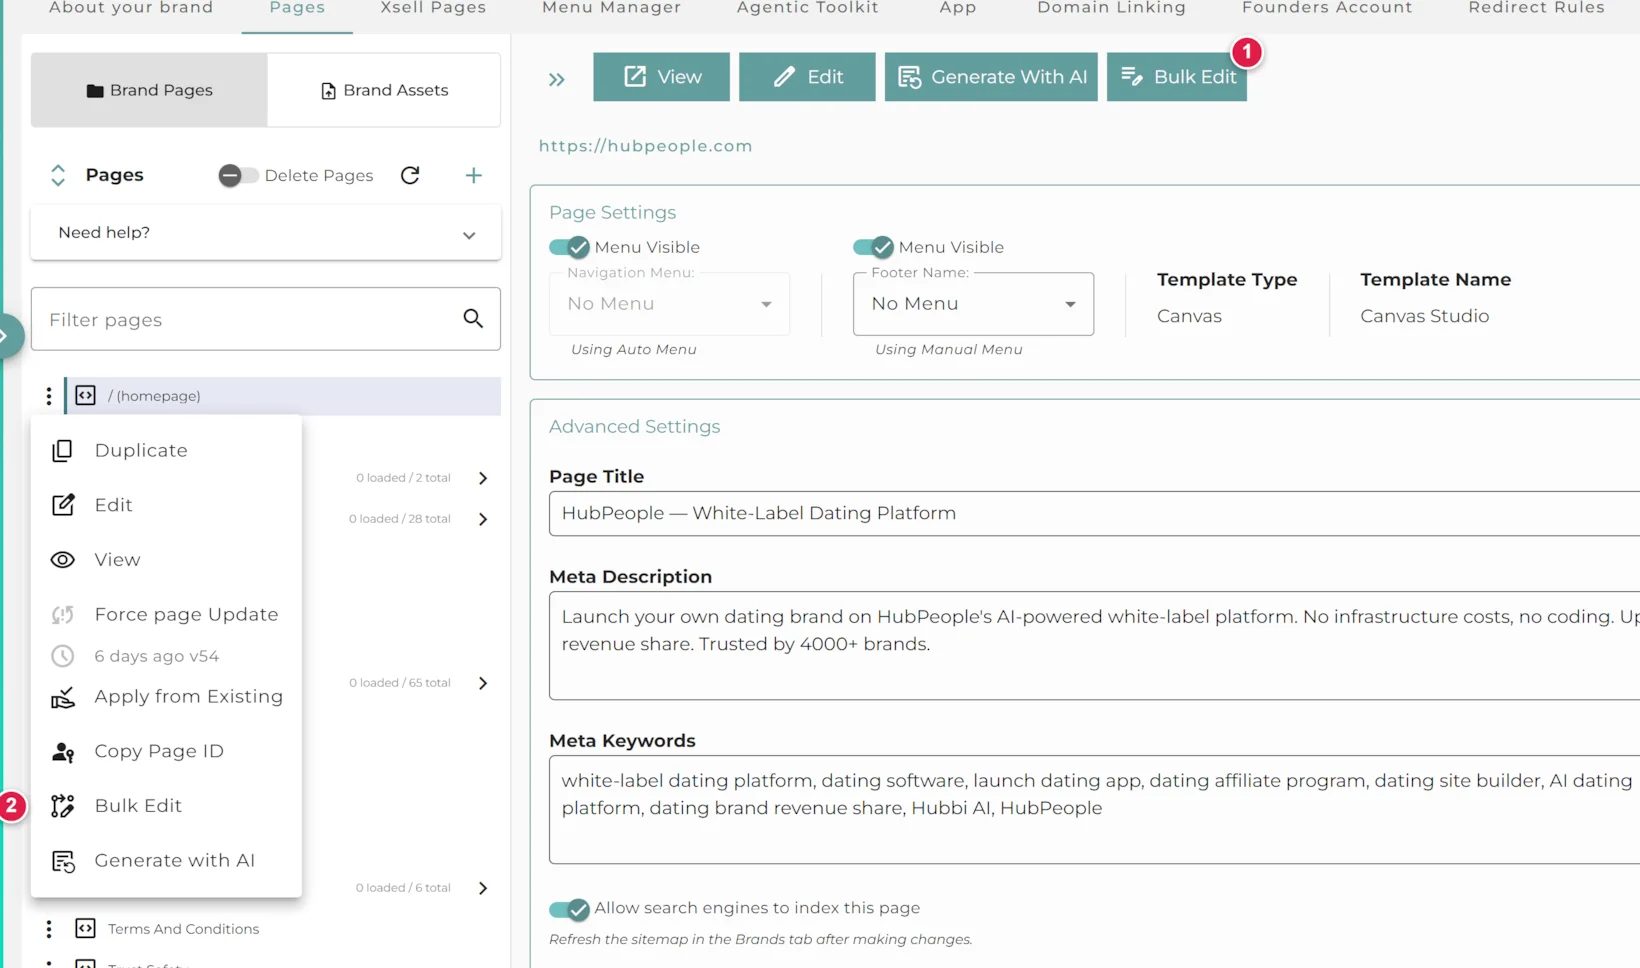
- 1The Bulk Edit button opens the editor for the whole brand.
- 2Bulk Edit in a page's three-dots menu opens it starting from that page.
The three sets of settings
The editor is split into three tabs along the top. You work on one set at a time, and you switch tabs freely while the panel is open.
| Tab | What it covers |
|---|---|
| SEO Metadata | Page title, meta description, meta keywords, whether search engines may index the page, and the canonical address. |
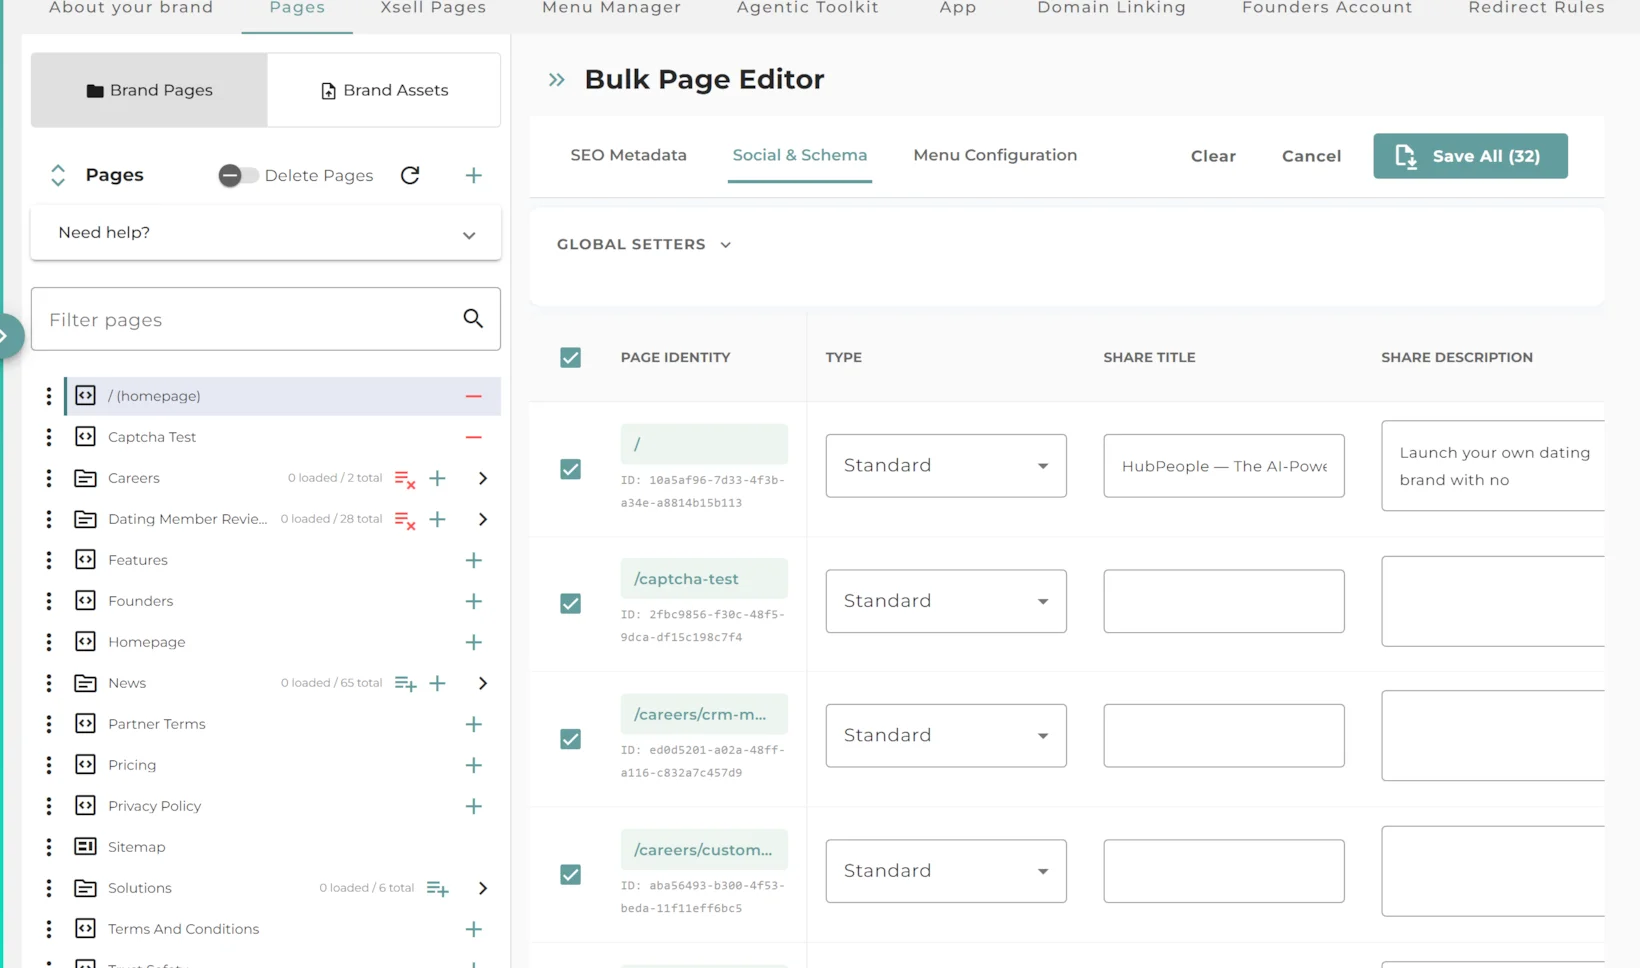
| Social & Schema | The share-card fields used when a page is shared (title, description, image), plus the article schema type, author name and URL, and the created and modified dates. |
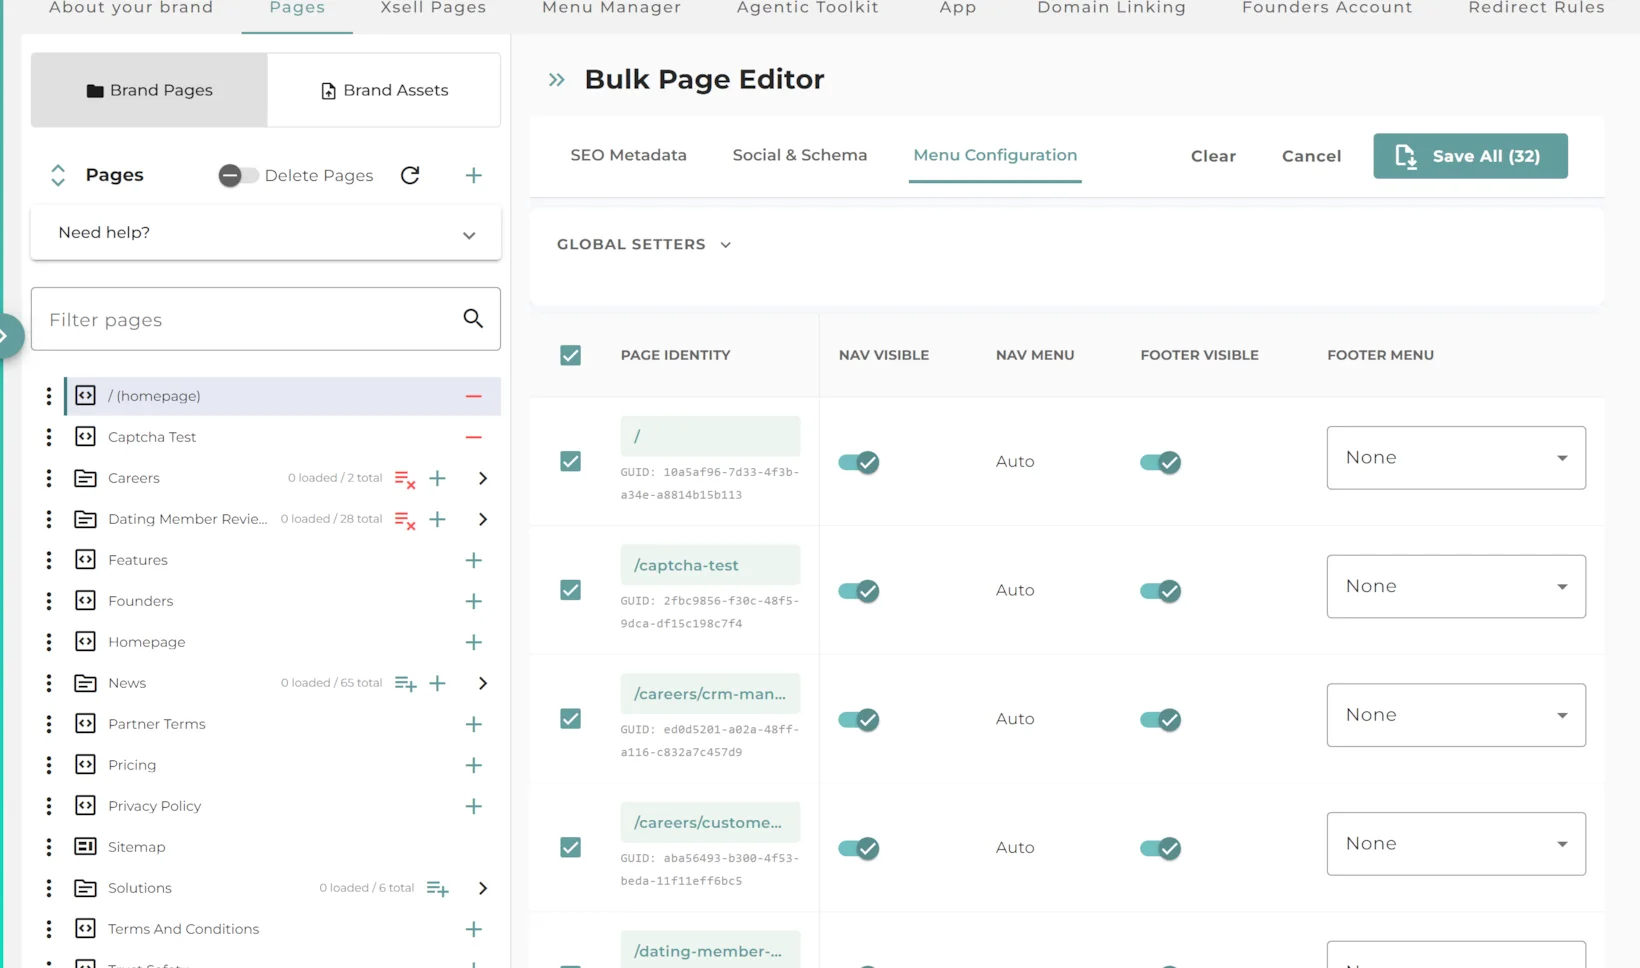
| Menu Configuration | Whether each page appears in the navigation and footer menus, and which nav and footer menu it uses. |
Whichever tab you are on, the same tools sit at the top: the tabs on the left, and Clear, Cancel, and Save All on the right.
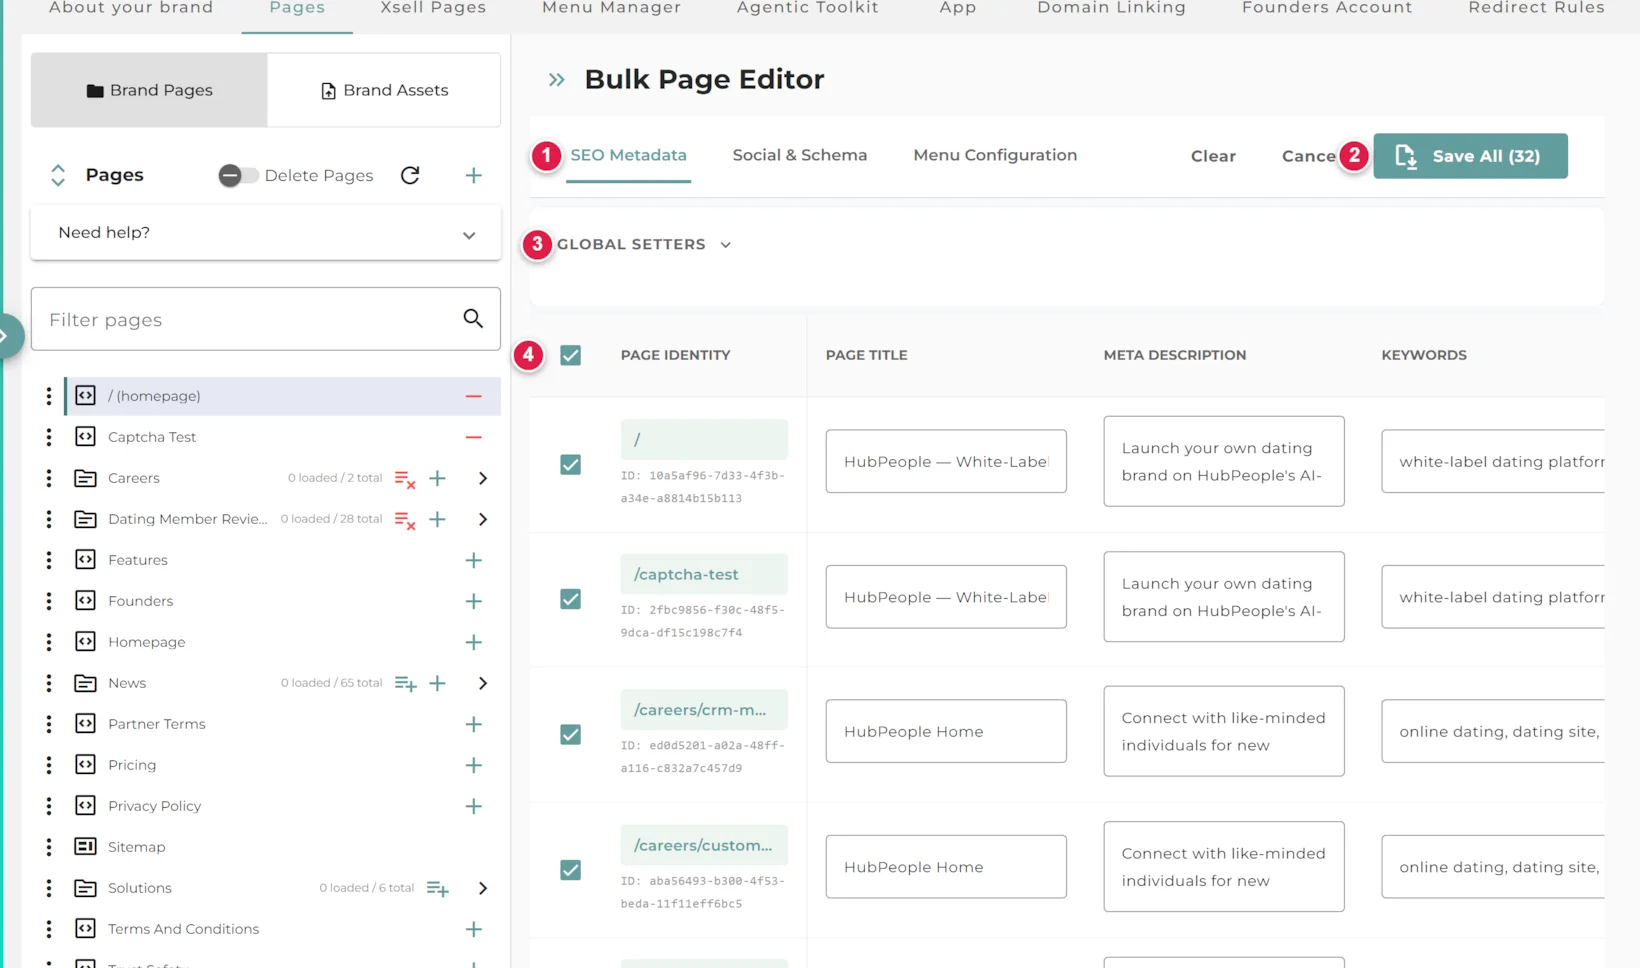
- 1The three tabs: SEO Metadata, Social & Schema, Menu Configuration.
- 2Save All writes every pending change; the number is how many pages are selected.
- 3Global Setters: set one value and apply it to your selection (shown next).
- 4Tick rows to choose which pages a change applies to; the box in the header selects all.
Filter to the pages you want
Use the Path Prefix box to narrow the list to a section of your site before you edit. For example, a prefix of /articles brings back only the pages under articles. Leave it empty to work across every page in the brand. The filter also decides what an export contains, so set it before you export a CSV.
Two ways to edit: in the grid, or by CSV
Once your pages are listed you have three ways to make changes: set one value and apply it to a selection, edit each row by hand, or round-trip the whole set through a spreadsheet.
Set once, apply to a selection
Each tab has a Global Setters panel at the top. Type the value you want once (for example one meta description), tick the pages you want it on using the checkboxes in the table, then click Apply to selection. The value drops into every selected row. Nothing is saved yet, so you can still adjust individual rows afterwards. Apply to selection stays disabled until you have at least one row ticked.
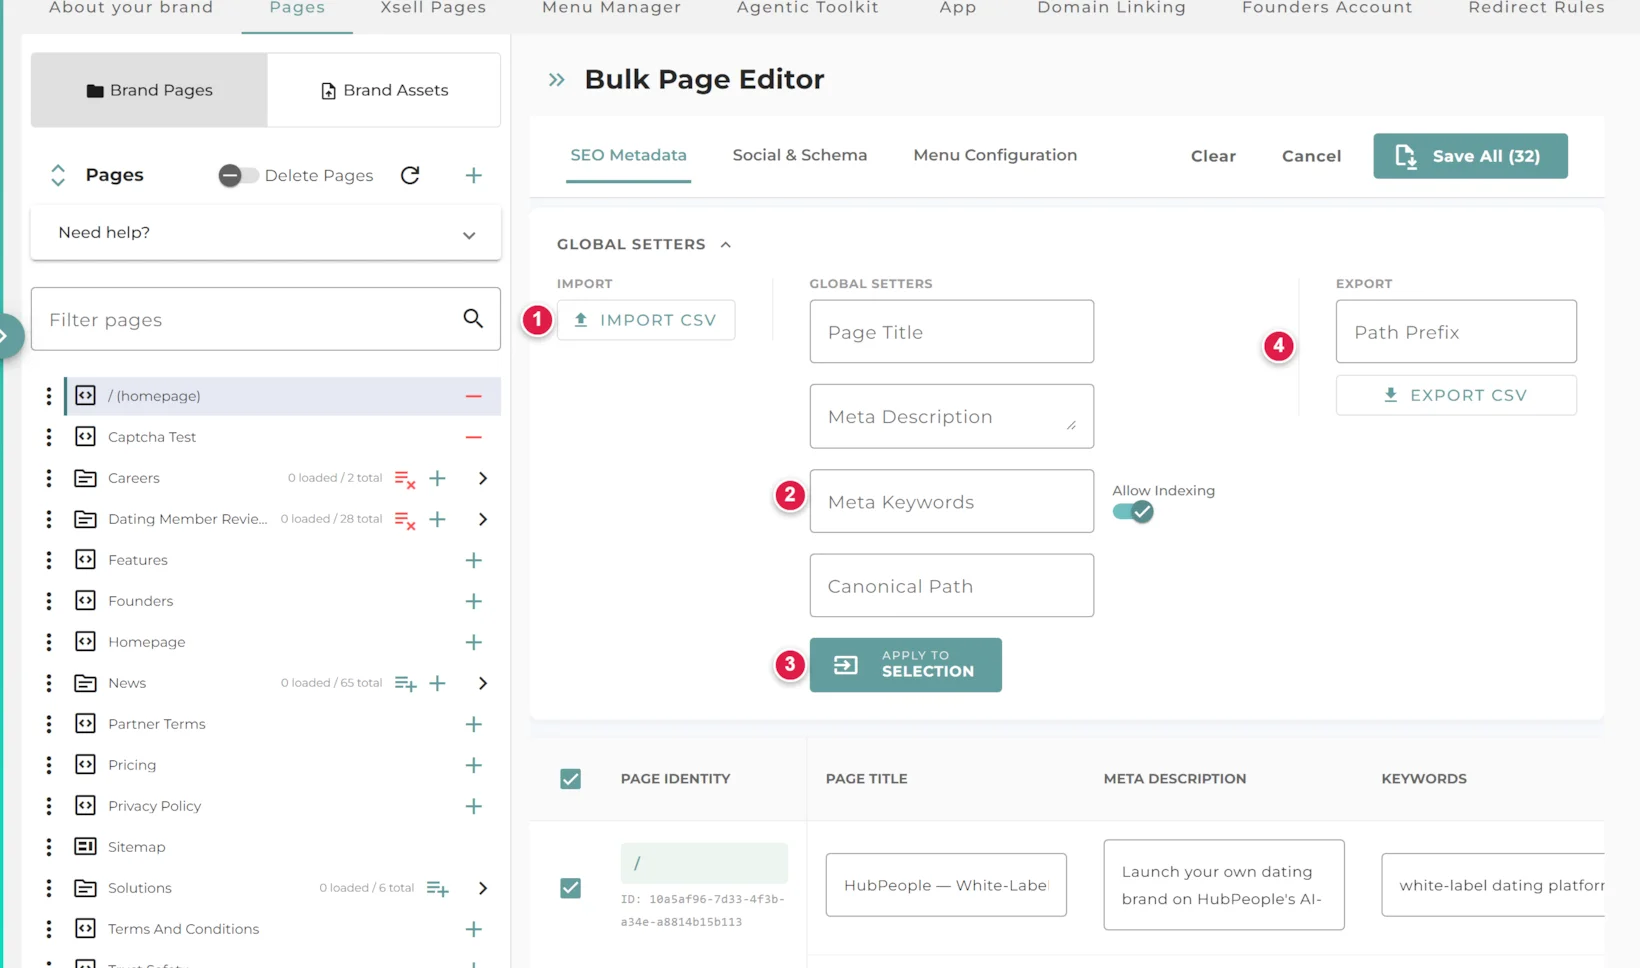
- 1Import CSV brings a saved spreadsheet back in.
- 2Fill a value once: Page Title, Meta Description, Keywords, Allow Indexing, Canonical Path.
- 3Apply to selection drops that value into every ticked row.
- 4Set a Path Prefix to narrow the set, then Export CSV to download it.
Edit row by row
You can also change values straight in the table, one row at a time. Each row is a page; each column is a field for the set you are on. Edit as many as you like, then save them all together with Save All.
Export and import a CSV
For larger changes, the spreadsheet route is often quickest:
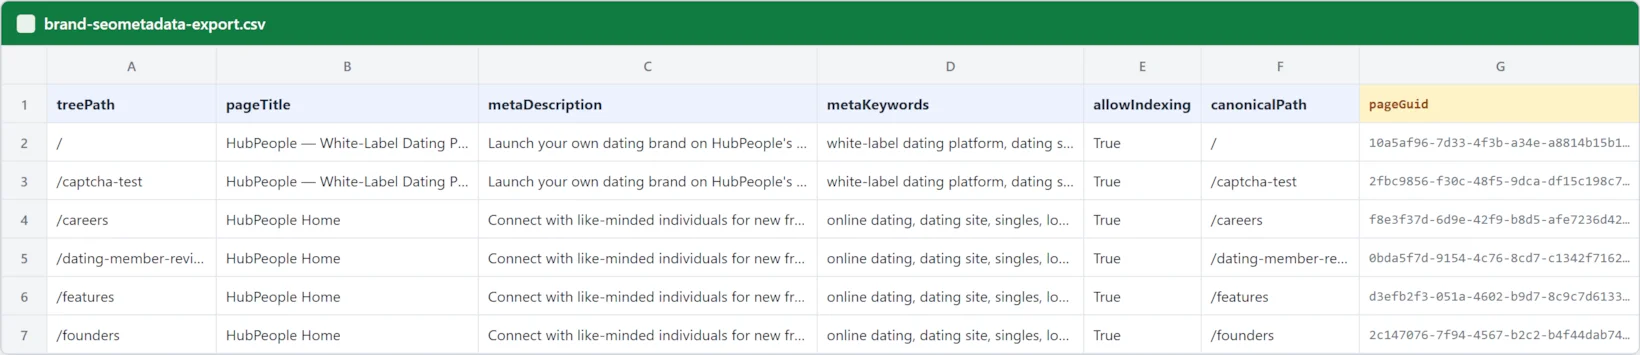
- Export CSV downloads the current set (for the tab and path filter you are on) as a CSV file.
- Open it in your spreadsheet tool, make your changes, and save it back as CSV. Keep the
pageGuidcolumn exactly as it is: that is how each row is matched back to the right page. - Import CSV reads your file back in and shows the changes in the grid, ready for you to review.
- Apply them with Save All.
What each set contains
SEO Metadata
The columns are Page Title, Meta Description, Keywords, Canonical Path, and Index (the toggle that allows or blocks search-engine indexing). When indexing is off, the canonical field is not used. The canonical field offers a search box so you can pick an existing page path rather than typing it.
Social & Schema
The columns are Share Title, Share Description, and Share Image URL (how the page looks when shared), plus Article Schema Type, Author Name, Author URL, and the Date Created and Date Modified used in the page's structured data. For the full picture of how these fields shape search and social previews, see Social & Sharing →
Menu Configuration
The columns are Nav Visible and Nav Menu, and Footer Visible and Footer Menu. In the grid you pick a menu from a dropdown of the brand's menus. In a CSV you give the menu by its name.
Save your changes and check they went live
Save All writes every pending change at once; the button shows how many pages are selected to save, for example Save All (12), and stays disabled until you have changes selected. Clear empties the current working list without saving, and Cancel closes the editor.
After you save, give the pages a moment to rebuild, then open a live page and confirm the change shows. Checking the live page matters: a few page templates set their own title or description from the page's own heading, so a saved value can be stored but not displayed on those pages. If a change does not appear where you expect it, check that page's template, or use Forcing a page to update →