
Moving an existing site onto the platform
Published Updated
Move a brand’s existing pages onto the portal CMS: rebuild them into the brand you already have, get them looking right, preview them on a temporary address until you are happy, and only then point your domain at them. Your traffic is not disrupted, and nothing your visitors see changes until that last step.
Coming back to this? See the Changelog for what has changed since you last read it.
Which brand to move first
Any brand’s pages can be moved into the HubPeople CMS. The ones worth doing first tend to look like this:
- Its website is served from somewhere other than the portal today.
- Most of its signups arrive organically or directly, rather than from adverts.
- It is an established domain with real content and some history behind it.
- The site has not been rebuilt in a long time.
Whatever shape the site is in, a move adds something
This holds for sites already doing well. The gain is in what the pages can do once they are on the platform, not in fixing something broken.
- A small site. A few pages on a domain with years behind it is ground you are not using yet. The move takes an afternoon, and everything you add afterwards builds on that history.
- A large site built from one template. Thousands of near-identical pages rarely earn their keep, and a high page count is not what wins rankings. One of our own migrations went from 7,815 variant pages down to about 1,600 focused ones and did better afterwards.
- A site search engines cannot read properly. No titles, no descriptions, no structured data. The content can be excellent and still be invisible, because nothing is telling Google or an AI assistant what it is looking at. The platform adds all of that as it builds.
Before you begin
What you need in place
- The toolkit installed, in a folder you can open. A migration runs scripts on your own machine, so the connection on its own is not enough. See installing the toolkit if you have not done it yet.
- Your Google Search Console data, if you have it. Not required, but it is the best way to know which pages actually earn you visits, and those are the pages to protect hardest.
- Access to the domain’s DNS. You only need it at the final step, but check you have it before you start.
Step 1: Get your bearings in the portal
You do not have to look anything up for the toolkit: it finds a brand by name. This step is worth two minutes anyway, because the portal is where you link the domain at the end and where the settings the toolkit does not touch are kept.
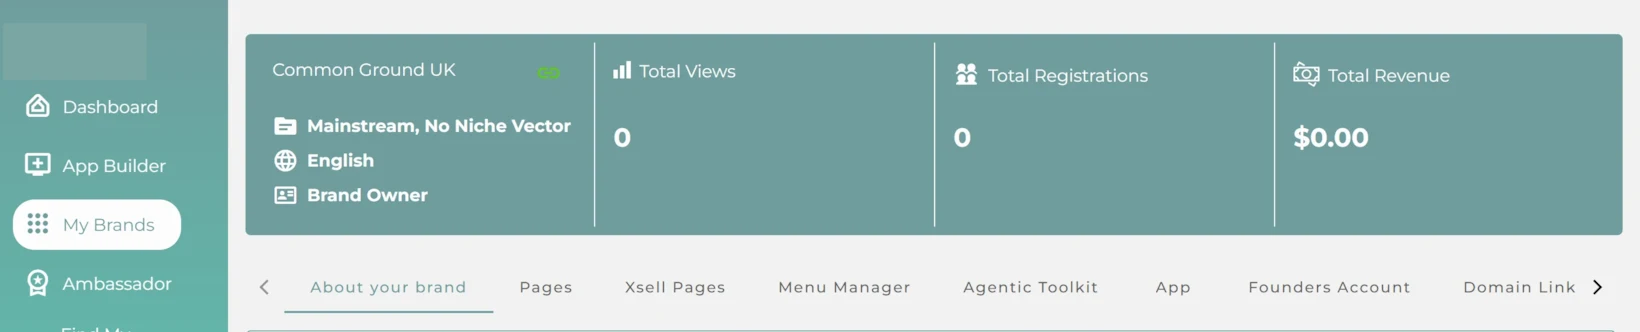
Your brand already exists in the portal. Every brand you own is in your account whether or not the portal serves its website, so there is nothing to create and nothing to sign up for.
- Open My Brands.
Every brand on your account is listed, including the ones whose websites are served elsewhere.
- Open the brand you are moving the site into.
Two of its tabs matter here. Pages is where your migrated pages will land, so it is worth a look now to see what is already there. Domain Link is the last step of the whole job.
Two brands with similar names? Use the identifier instead. It is the long string at the end of the address when the brand is open, after my-brands/, and the toolkit accepts it in place of the name.
Step 2: Start migrating the pages from your current site
Use the Code tab in the Claude app, not Chat and not Cowork. A migration runs real scripts against real files in your toolkit folder, and Code is the mode built for that.
- Open the Claude desktop app and go to the Code tab.
- Open the folder you installed the toolkit into. Just above the message box, a small button shows which folder is open. If it says No folder, nothing is open yet. Once you send the first message the button moves to the top of the window, beside the session name. You can click it there to change directory if you opened the wrong folder.

- Start a new chat in that folder.
Then say what you want in plain words. Name the brand and the site, and let it take over from there.
I want to migrate dateme.com onto my Common Ground UK brand. Read the site and tell me what is there.
It says the brand back to you before it does anything, so you can catch the wrong one. Then it starts reading, tells you roughly how long it will take, and says it is writing nothing to your brand while it reads.
A few hundred pages takes several minutes, because of the one-request-a-second pacing. A large site can take considerably longer. It runs in the background, so you are not stuck watching it.
Step 3: Agree the plan
When the read finishes it reports back what it found on your site and suggests a plan: what comes across, which pages are really one shape repeated, and where an address already has a page on your brand.
Read it, say what you want changed, and agree it. Nothing is written to your brand until you do.
Step 4: Build it and shape it, a bit at a time
It builds a piece at a time and shows you each one before moving on. Your brand is on a temporary address throughout, so you can click through the real pages as they appear.
- Pages that are really one shape repeated. One is designed properly and the rest of the set is filled from it. You see the designed page, a couple of others filled the same way, and the number you are agreeing to before any of them are built.
- Pages with words of their own are built one at a time and shown to you.
- Your assets come across with them.
- Your menu is rebuilt in the portal, so you can change it later from the Menu Manager without touching any pages.
Checking the pages
Your pages are on a temporary address on the platform while you work. Ask Claude for the address of any page at any time, and open it.
Check things like:
- Check the pages on a phone.
- Check titles and descriptions.
- Check your join and register links.
Step 5: The redirect map
This is what decides whether your traffic survives the move.
Start from a crawl of the site you are leaving
Before anything else, crawl your current site and export the full list of addresses from its sitemap. That list is the source of truth for the redirect map: every address on it has to end up somewhere. It is the only way to know you have not quietly lost a page, because the page nobody thinks about is exactly the one that disappears.
What a finished map looks like
Most addresses come across unchanged, which is the whole point, and an address that does not change needs no redirect. Every address that does change needs a row, and every row has to meet the same bar:
- One hop. A single permanent redirect from the old address straight to the new one. No chains where one redirect lands on another.
- Landing on a page that exists. Every destination returns a real page. A redirect to a missing page is worse than no redirect at all.
- No loops. Nothing that redirects back to where it came from.
- Nothing missed. Every address from the crawl is accounted for, either redirected or deliberately kept.
A big map is usually a small number of rules. On one of our own migrations around 950 redirects collapsed into nine wildcard rules and a handful of exact rows, because most of them were the same pattern repeated. Work the patterns out before anyone starts typing rows by hand.
Where the rules go: two places, and which to pick
Two places, and for a full migration the second is usually the right one.
Your brand has its own Redirect Rules tab in the portal, next to the other brand tabs. It does Direct, Wildcard and Regex rules, so a repeating pattern is one rule rather than hundreds, and it is the obvious tool when you have a handful of addresses to move. See Redirect Rules for how they work.
One thing to know about portal rules: a rule only fires where there is no live page at that address. A published page always wins. That is a safety feature and it is exactly what you want, but it means a rule whose source is still a live page sits there doing nothing until that page goes away.
For a full migration, put the map at the edge instead, at your DNS or CDN. Three reasons. It sits in front of everything, so the rules fire the instant DNS switches rather than depending on what is or is not published on the brand. It is the only layer that can also normalise the host and the protocol, which is what gets an old plain-HTTP or non-www address to your live homepage in a single hop. And you can stage a large map there and test it before the switch, instead of building it live.
For Cloudflare specifically, see Cloudflare DNS and SSL. Stage the rules ready to activate rather than switching them on while the old site is still serving.
Have the rules staged before you move DNS, not after. The gap between the site moving and the redirects going in is a gap where real pages return errors to real visitors and to search engines.
If this brand has a sister site in another country
If you are moving one regional site and its counterpart lives elsewhere, pair the equivalent pages so search engines know they are the same page for a different audience. Two rules about it, both easy to get wrong:
- Both sides ship together. Each site points at the other and at itself. If only one side ships, search engines ignore both.
- The tags on the site that is already live must not go up early. Until cutover, the addresses they point at still serve the old site. Prepare them now, publish them at launch.
Step 6: Launch day, in order
Everything up to here has been reversible, because your real site never changed. This is the step that makes the move real, and the order matters more than the speed.
- Link your domain to the brand.
On the Domain Link tab. The full route, including the SSL choice, is in linking a domain to your brand. Your temporary address keeps working throughout, so nothing goes dark while you set it up.
- Activate the redirect rules at your DNS or CDN.
- Purge the cache, hard.
A full purge at your CDN at the moment of the switch. Skip it and crawlers keep being served the old site for a while: a stale homepage, an old footer, a canonical pointing somewhere wrong, dead links. That has happened, and it is avoidable in one click.
- Re-render every page. This one is not optional.
Your canonical tags, sharing URLs, structured data and sitemap are all generated against whatever domain is serving the brand, and rendered pages are cached. Until every page is re-rendered they still carry the old address. So the moment the domain is linked, force a refresh of all pages, then spot-check that the canonical and the sharing URL on a few of them show your real domain.
- Turn indexing back on.
The moment the domain points at the new site. A relaunched site left on noindex is the classic migration failure, and it is silent: everything looks perfect and the traffic simply never comes back.
- Regenerate the sitemap and submit it.
Once the live domain is linked, regenerate it so it lists the new page set on your real addresses, then submit it to Search Console. See sitemaps and search indexing.
- Publish the paired-region tags on both sites, if you paired a sister site.
- Spot-check redirects on production.
Take real old addresses off your map and follow them. Each should reach a working page in one hop.
- Check the plain homepage address resolves cleanly, including
/index.htmlif your old site had one. It should reach your secure homepage in a single hop, with no insecure step in the middle.
After launch
- Re-crawl the live site.
Crawl your real domain and check four things: no address from the old set returns an error, canonicals and structured data show the live domain, the paired-region tags validate in both directions if you have them, and every address in the sitemap returns a real page.
- Watch Search Console for a couple of weeks.
Coverage, redirects, and paired-region errors if they apply. Some movement in rankings is normal after any migration. What is not normal is a page that used to earn visits returning an error, and that is what you are looking for.
From now on
The site is on the platform now, so you work on it the way you work on any other brand: ask for new pages, edit the ones that came across, and push when you are happy. That runs off the HubPeople MCP and the toolkit, the same two things you used to move it.
Changelog
| Release | Changes |
|---|---|
| 16 September 2026 | Rewritten shorter. The eight steps became six: agreeing the plan and building the pages are now two steps rather than four, and describe working with the assistant rather than a fixed sequence. Removed the four-state plan table, which described something the toolkit does not produce. Removed the prompt book, the combined checklist, how to judge an answer, what to watch for and what a migration will not do. The guide is about half its previous length. |
| 15 September 2026 | First published. Covers choosing which brand to move first, finding the brand in the portal, the read, the plan, building a set at a time, previewing on the temporary address, the redirect map, and the launch-day order. Includes the fast path for a site of only a page or two, four checklists, a prompt for every stage with what a good answer looks like, and how to judge a reply you cannot check yourself. |